View All Posts
read
Want to keep up to date with the latest posts and videos? Subscribe to the newsletter
HELP SUPPORT MY WORK: If you're feeling flush then please stop by Patreon Or you can make a one off donation via ko-fi
#ACTIVE JOB #ACTIVE-ELASTIC-JOB #AWS #ELASTIC BEANSTALK #RUBY ON RAILS #SQS

Active Job is a framework for declaring jobs and making them run on a variety of queuing backends. In this post we’ll be setting up a worker environment on Elastic Beanstalk and using SQS as our Active Job queue.

We’ll be using the active-elastic-job to do the heavy lifting for us, so this post will be mostly focussed on the configuration to get this Gem working.

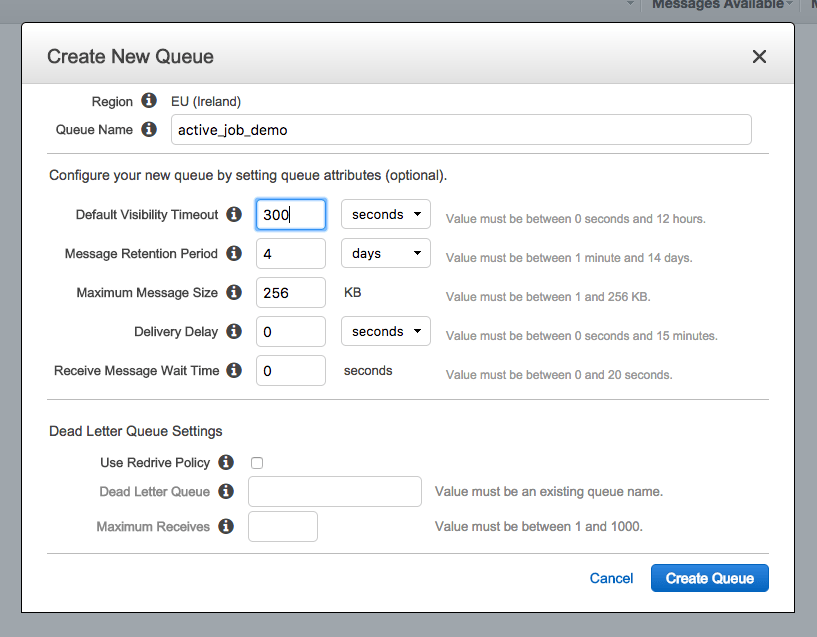
Our first port of call will be Simple Queue Service in our AWS account. We’ll need to create a new queue:

Create a new SQS Queue.

Now we have our queue we need to give our Elastic Beanstalk environments access to it. If we look at our existing environment we can see that it was created with an instance profile:

Instance Profile

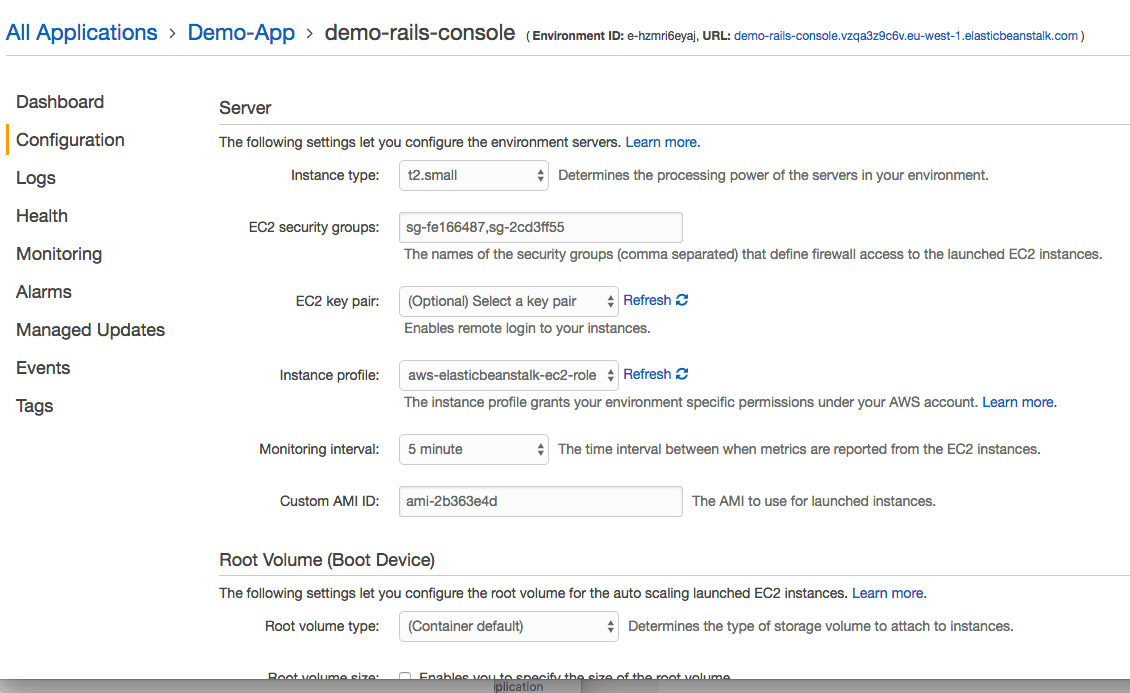
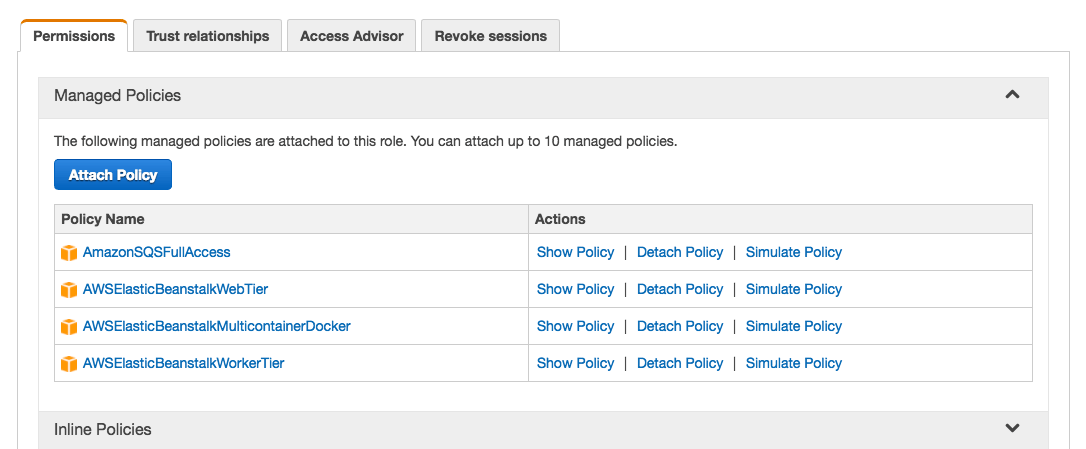
In my case the profile is called aws-elasticbeanstalk-ec2-role. Make a note of this profile name and go to IAM users. Goto the roles tab and find the matching role. You now need to attach a policy to the role that allows access to SQS. In this demo we just use the SQS full access policy, but you may want to create a new policy that limits access to the queue you just created.

Instance Profile

The active-elastic-job needs to know which region we are running in so we need to add an AWS_REGION environment variable. For my region this will be eu-west-1 you may be running in a different environment so check what your region is called.

Instance Profile

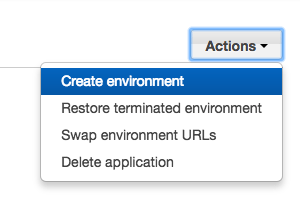
We are now ready to create our worker environment. Goto your application and in the actions drop down click Create Environment

Instance Profile

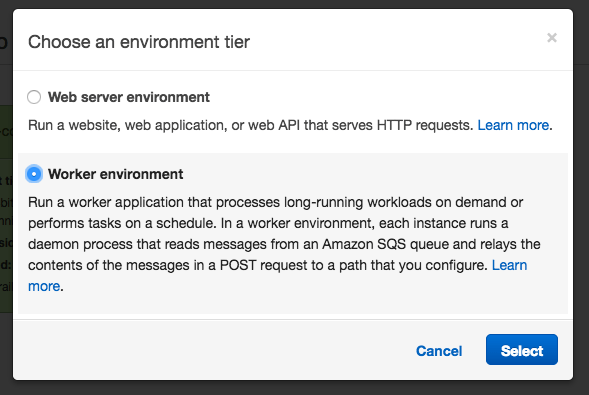
For the environment tier - pick Worker environment:

Instance Profile

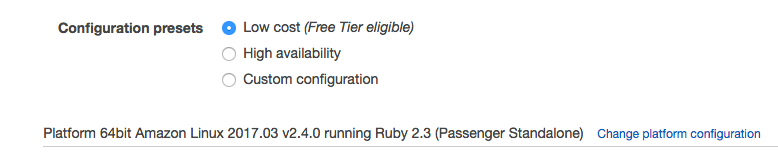
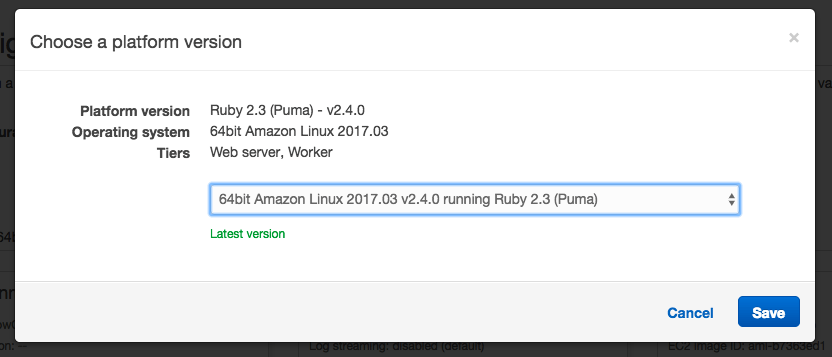
Make sure to pick Ruby as your Platform and then click Configure more options. On the next screen make sure to change the platform configuration to match your web server environment.

Instance Profile

Select Puma

Modify the Environment Settings to give your new environment a sensible name (e.g. demo-worker).

Modify the Sofware and copy across the following environment variables from your web env - DATABASE_URL (so we can connect to the database), SECRET_KEY_BASE (so we can encrypt and decrypt the same data) and AWS_REGION (so the active-elastic-job Gem knows which region we are in).

We also need to switch on processing of job in this environment. To do this we need to add PROCESS_ACTIVE_ELASTIC_JOBS and set it to true.

Check the Security to make sure the IAM instance profile matches the one we modified for SQS access.

And finally open the Network tab and select our VPC, choose our private subnets and the webserver security group (the webserver security group gives access to the PostgreSQL database).

You can now click Create Environment.

On the rails side we need to tell Active Job to use our active-elastic-job queue adapter. Add the active_elastic_job to our Gemfile and run bundle install. Now edit:

# config/environments/production.rb
config.active_job.queue_adapter = :active_elastic_job

In our Rails application create an Active Job by running

rails generate job capitalise_name

And in the code for our job set the queue_as property to the name of the queue we created e.g:

class CapitaliseNameJob < ApplicationJob
  queue_as :active_job_demo

  def perform(person)
    person.capitalized_name = person.name.capitalize
    person.save!
  end
end

And you can now add calls to this job in your code e.g:

CapitaliseNameJob.perform_later @person

Deploy the changes out to your web environment:

eb deploy --profile demo

And then deploy the same code out to your new worker environment:

eb use demo-worker --profile demo
eb deploy --profile demo

You can switch between different environments using (assuming your environments are name demo-web and demo-worker:

eb use demo-web --profile demo
eb use demo-worker --profile demo

Your ActiveJobs should now run successfully in your worker environment. If you have issues then check the elastic beanstalk logs on each environment:

eb use demo-web --profile demo
eb logs --profile demo
eb use demo-worker --profile demo
eb logs --profile demo
#ACTIVE JOB #ACTIVE-ELASTIC-JOB #AWS #ELASTIC BEANSTALK #RUBY ON RAILS #SQS

Related Posts

Step 4: Deploy Rails App To Elastic Beanstalk from Command Line - This post guides you through the essential steps of creating and deploying a Rails application into Elastic Beanstalk environment. Topics include creating an AWS user, configuring AWS CLI for deployment, and setting up the environment variables for your app. Also, it provides you the valuable knowledge of connecting your Rails app to RDS instance and ensuring it successfully connects with the dev database.
Step 5: Use CircleCI to Deploy To Elastic Beanstalk - In this blog post, we're going to set up an automated deployment pipeline using CircleCI, GitHub, and AWS Elastic Beanstalk. We'll begin by creating a GitHub repository for our Rails application. Next, we're going to help CircleCI understand our build environment by creating a `circle.yml` file to install the AWS EB CLI tools and to define commands for deploying our application. Lastly, we'll set up the required AWS credentials in CircleCI. Once completed, any changes pushed to the develop or master branch in GitHub will trigger a deployment to the respective environment in Elastic Beanstalk.
Step 2 - Setup Elastic Beanstalk: Deploying a Rails Application to Elastic Beanstalk - In this post, I describe how to set up, configure and deploy an Elastic Beanstalk application on a VPC in Amazon AWS, using Rails 5 and Ruby, using Puma for deployment and configuration of Public and Private subnets in Elastic Load Balancer. I also cover the details of network card settings, the selection process for subnets and security groups for Load Balancer and Instances, and finally shared the result of deploying the sample application on Elastic Beanstalk.
Step 1 - Setup VPC: Deploying a Rails Application to Elastic Beanstalk - In this blog post, I am guiding you through the process of deploying a Rails application to Elastic Beanstalk in a Virtual Private Cloud (VPC) on Amazon AWS. I detail the setup of a VPC, subnets, and internet gateways, as well as the configuration of NAT gateways and security groups. Ultimately, this will allow for a safe, internet-accessible environment for your application and its accompanying databases.
Step 6: Add a Custom Domain and SSL to Elastic Beanstalk - In this post, we successfully set up a custom domain name for our Elastic Beanstalk environment and secured it using SSL. By creating a CNAME or an ALIAS pointing at our environment URL (found on the dashboard screen), we made our app accessible via the new domain name. We then used AWS Certificate Manager to add SSL to our environment for access over HTTPS, which was confirmed by visiting the secured site. Now we have a Rails application that can not only be deployed by a CI server, but is also SSL secured with a custom domain.

Related Videos

The Hacker News Effect - The Website Didn't Catch Fire - Let's look at the traffic - Witness the Hacker News effect in action as the author's blog skyrocketed to popularity, easily handling massive traffic thanks to efficient hosting and Cloudfront!
AR Sudoku Solver in Your Browser: TensorFlow & Image Processing Magic - Discover how to recreate a Sudoku app using browser APIs and ecosystem advancements, and explore the image processing pipeline technique for extracting Sudoku puzzles and solving them.
Augmented Reality iPhone Sudoku Grab - Experience real-time augmented reality capture with the new version of Sudoku Grab! Learn to build your own app with detailed guidance provided in the linked article.
Revolutionize Your Raspberry Pi Development with VSCode Remote! - Learn how to develop code on Raspberry Pi using VSCode without needing VNC or a desktop environment by setting up a remote development environment. Develop your projects more conveniently and efficiently with this powerful tool!
You Need Arduino GitHub Actions - Learn how to add GitHub badges to your Arduino projects, improving project visibility and attracting contributors. Set up automated build checks with GitHub Actions to prevent broken code merges.
HELP SUPPORT MY WORK: If you're feeling flush then please stop by Patreon Or you can make a one off donation via ko-fi
Want to keep up to date with the latest posts and videos? Subscribe to the newsletter
Blog Logo

Chris Greening


Published

> Image

atomic14

A collection of slightly mad projects, instructive/educational videos, and generally interesting stuff. Building projects around the Arduino and ESP32 platforms - we'll be exploring AI, Computer Vision, Audio, 3D Printing - it may get a bit eclectic...

View All Posts