Making Hard PCBs…
I saw this resistor box on the EEVBlog channel and noticed a comment from one the viewers suggesting that the PCB could be improved with a bit of DIY nickel plating - which apparently, according “Mr J.F. Christ” is “surprisingly simple” (you have to love some of the usernames that people pick).

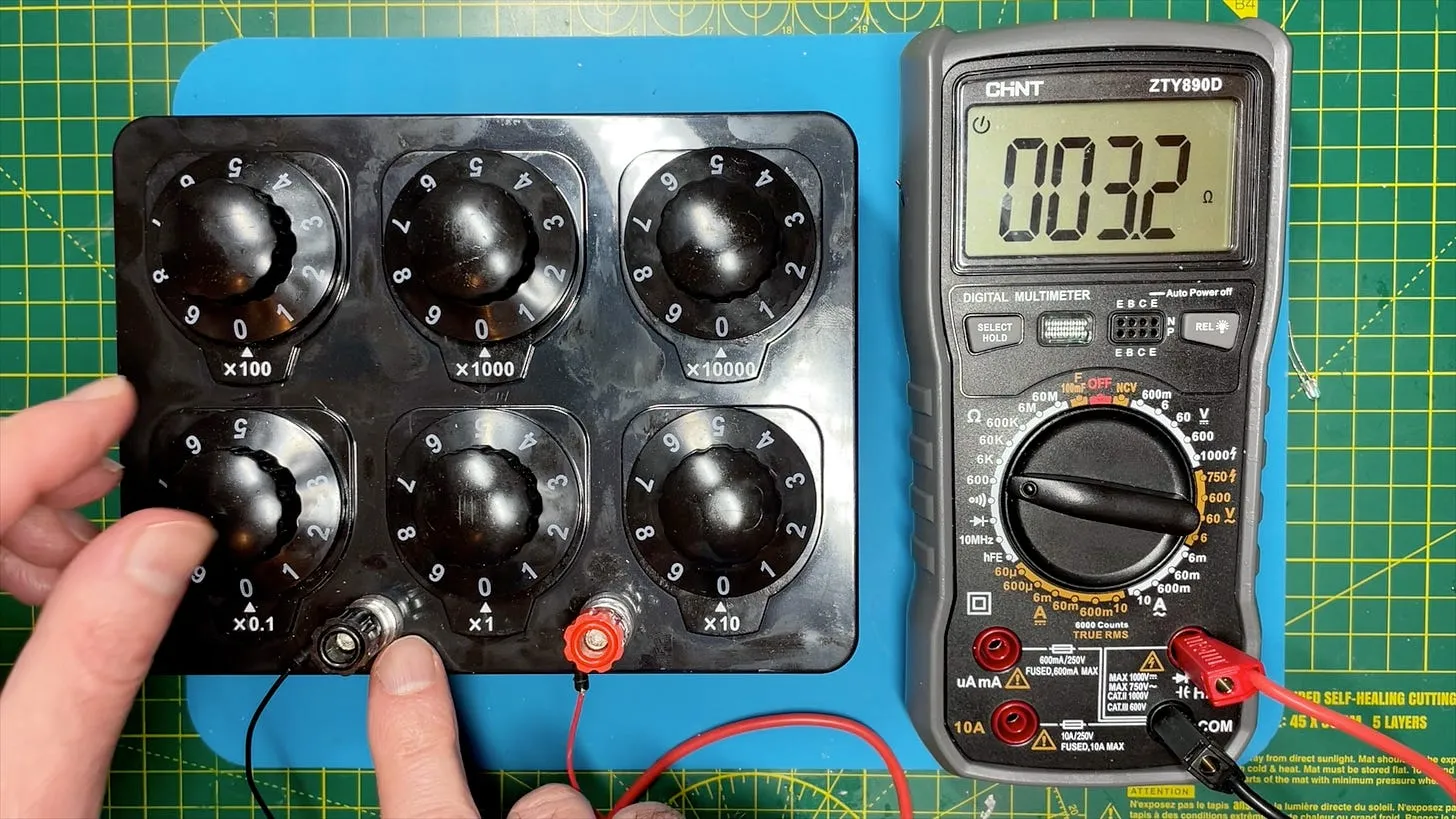
The box is surprisingly functional - my one came properly connected unlike the EEVBlog one and the resistance tallied up nicely with the nobs.
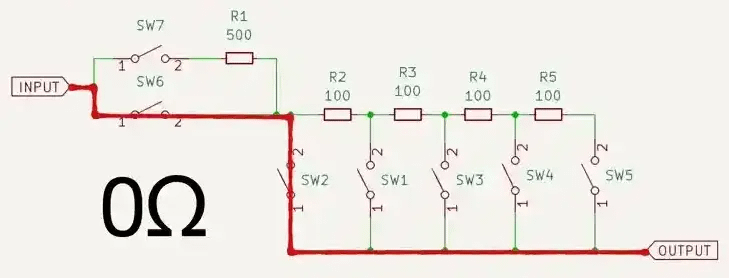
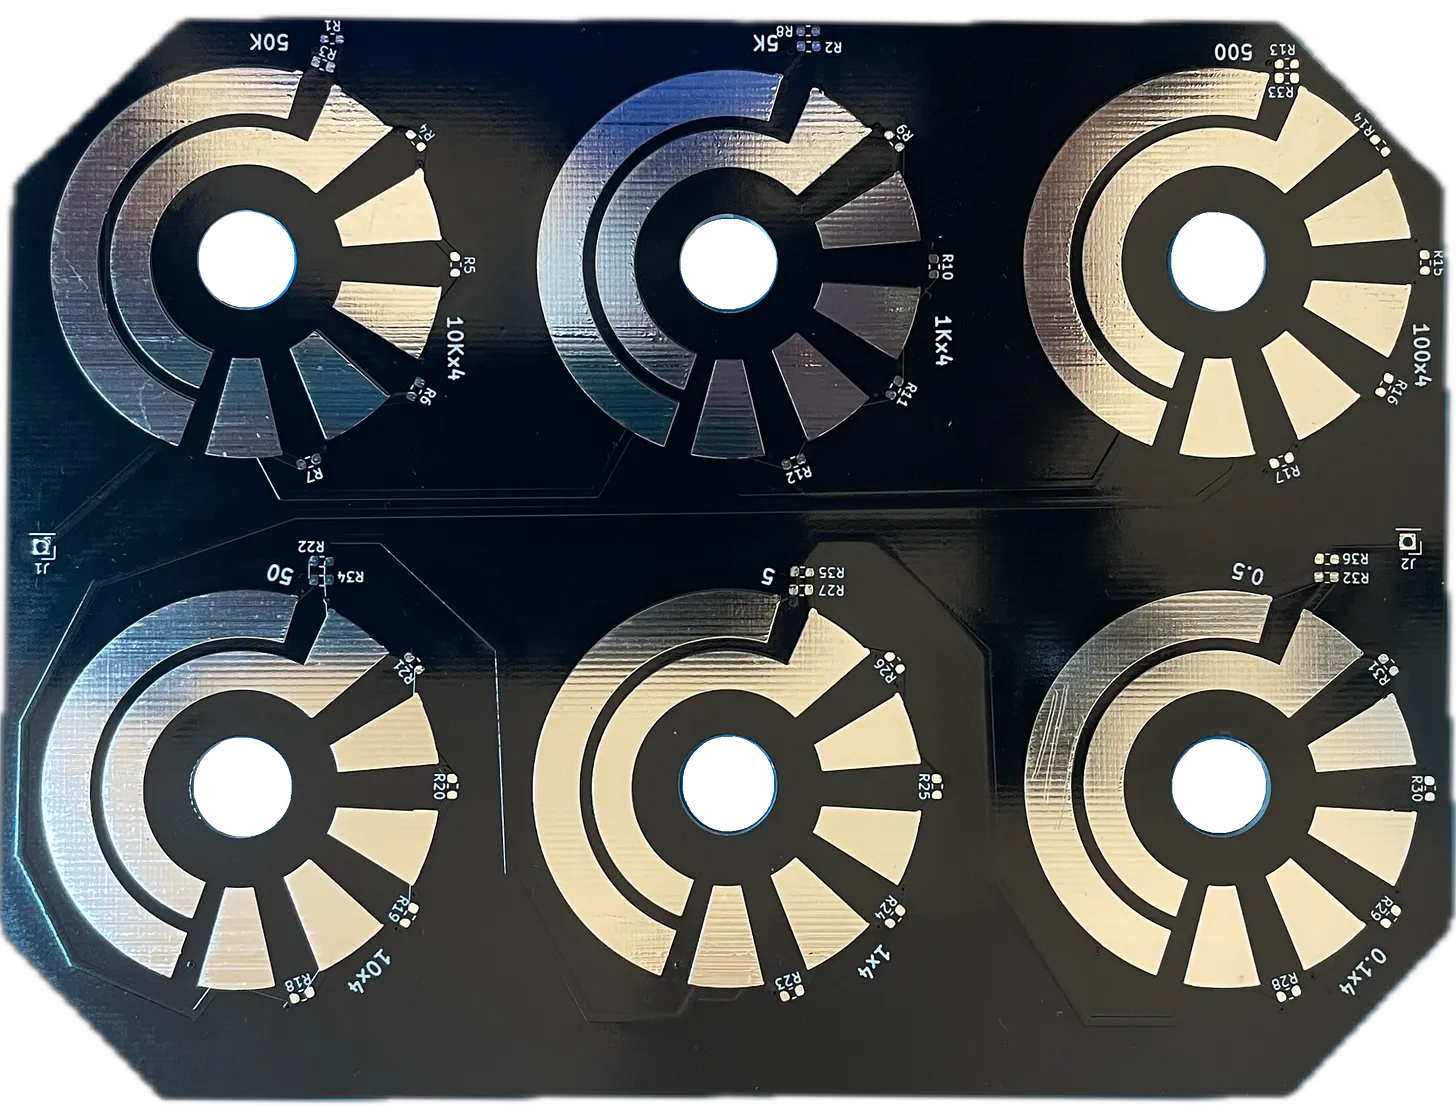
The construction is surprisingly simple and quite clever. The PCB is pretty efficient, needing only 5 resistors for each selector switch.
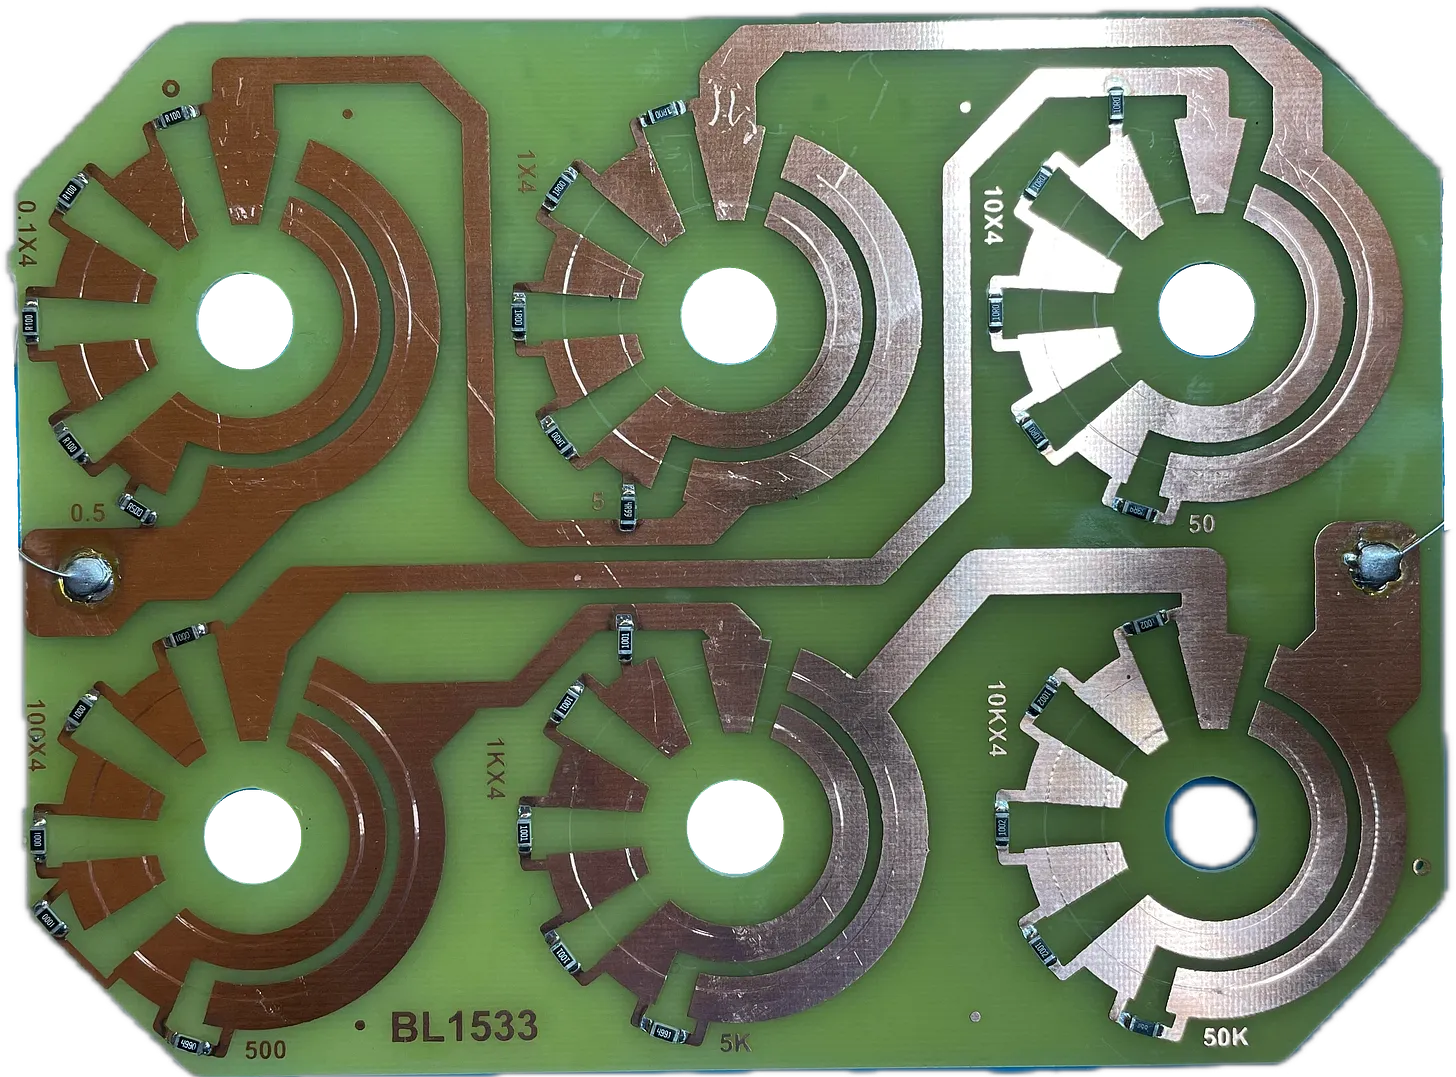
This is pretty ingenious - I’m sure it’s a well known technique, but I think it’s pretty clever and it’s new to me. Taking the 100 ohm ring as an example we have 4 x 100 ohm resistors. As the knob rotates we switch these in series into the circuit. Once we reach 400 ohms the next click of the knob switches in a 500 ohm resistor and then subsequent clicks switch in the 100 ohm resistors in series with the 500 ohms.
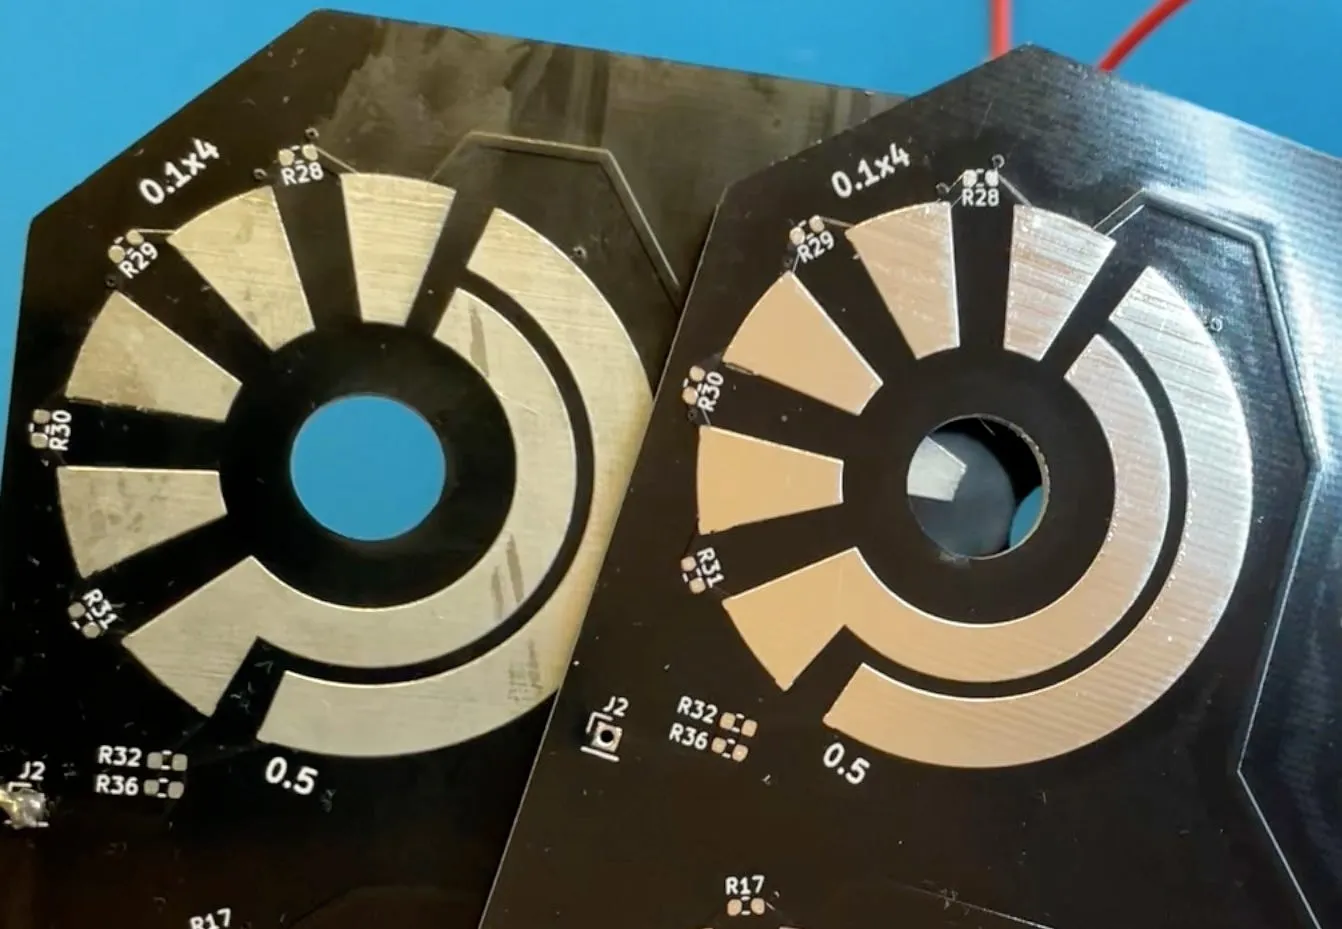
The problem is, as you can see from the image of the PCB, we’re just scraping the contact over the bare copper, we’re slowly scratching away the surface.
Ideally we need a hard wearing coating over our soft copper. Let’s try a bit of nickel plating!
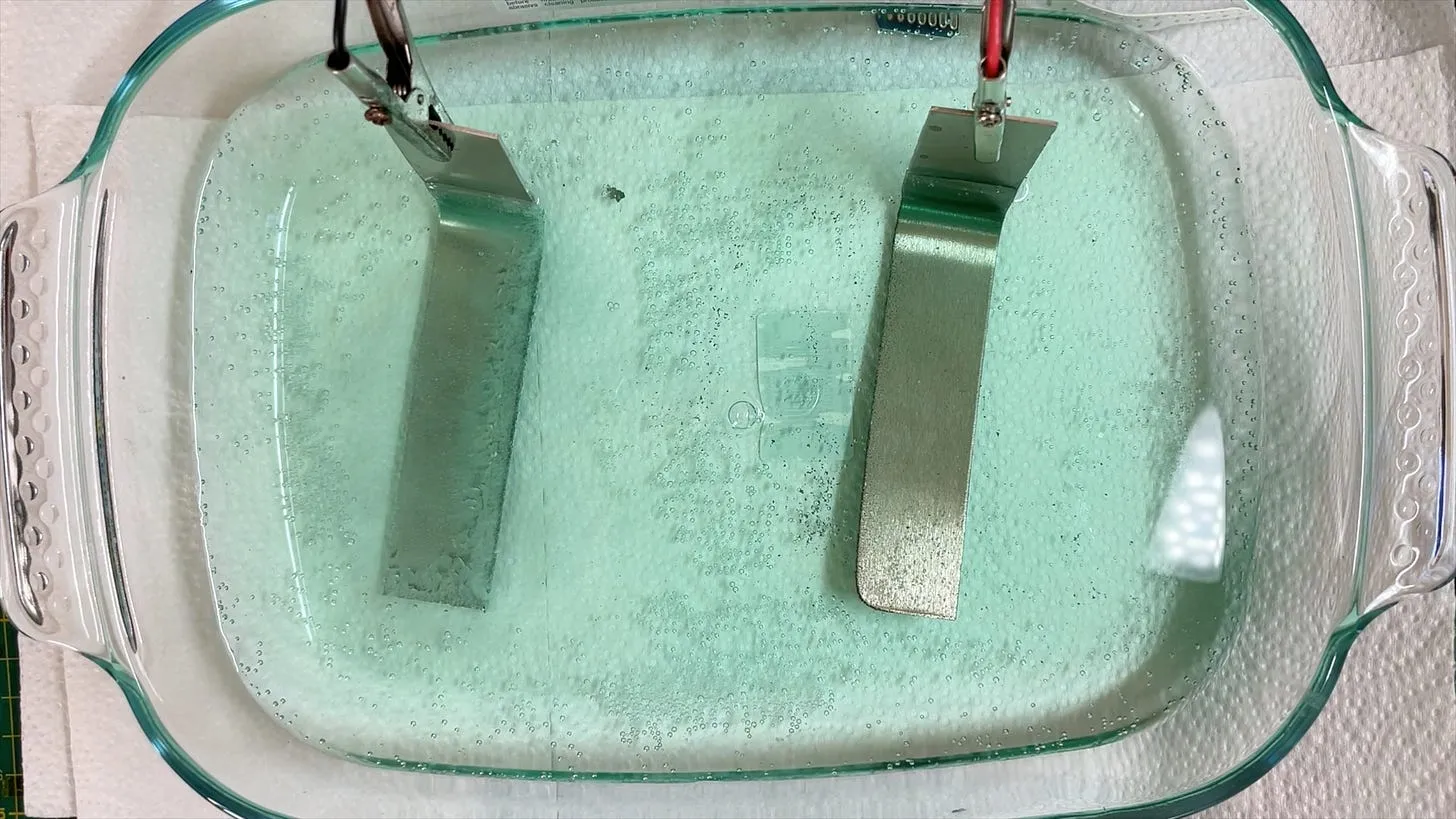
In theory this is pretty straightforward, you just need some nickel electrodes, some strong white vinegar (5% acidity) and some electricity.
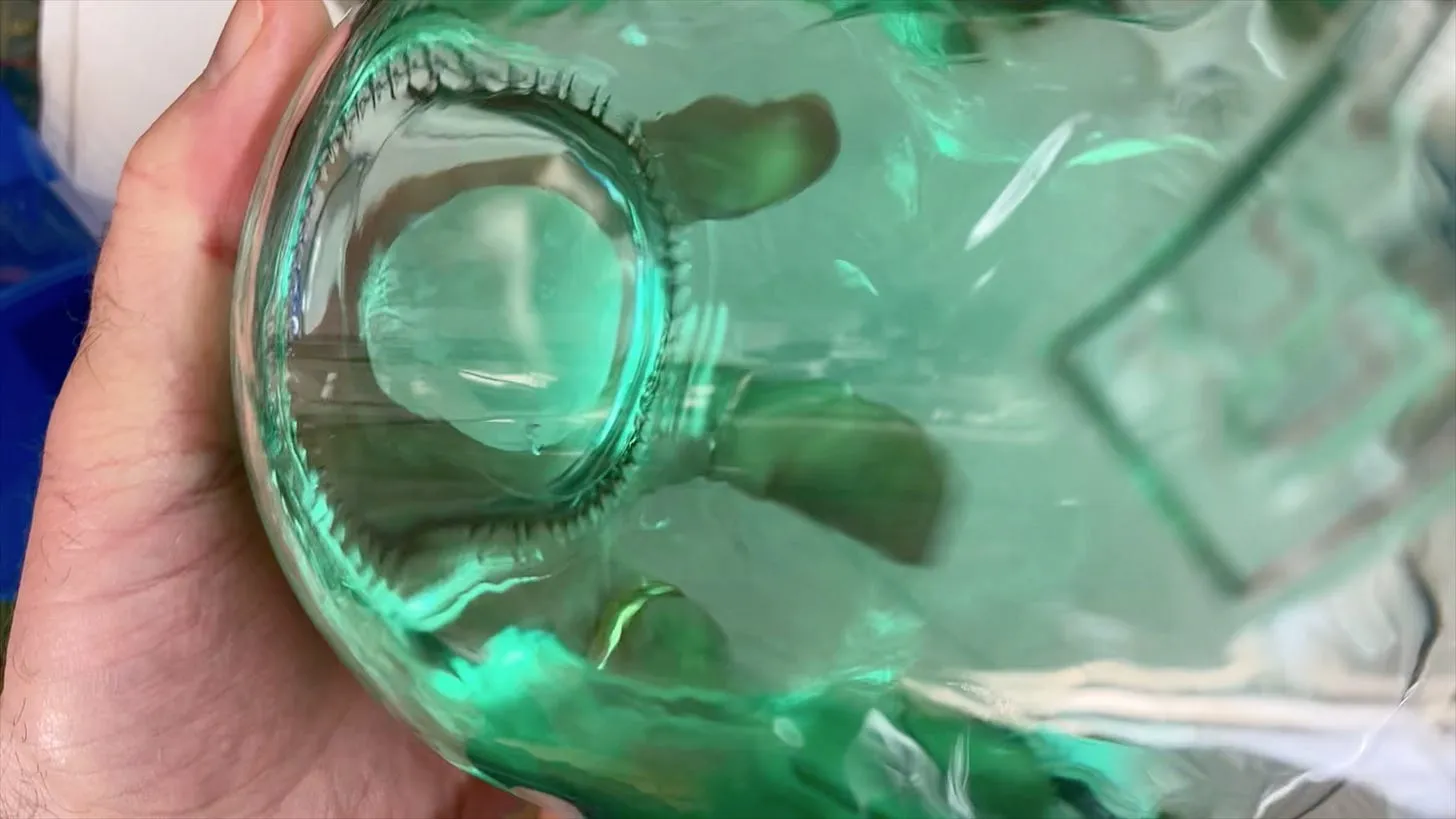
What you should end up with is some really nice greenish/blue liquid. My initial attempt produced something that looks like it belongs in the toilet.
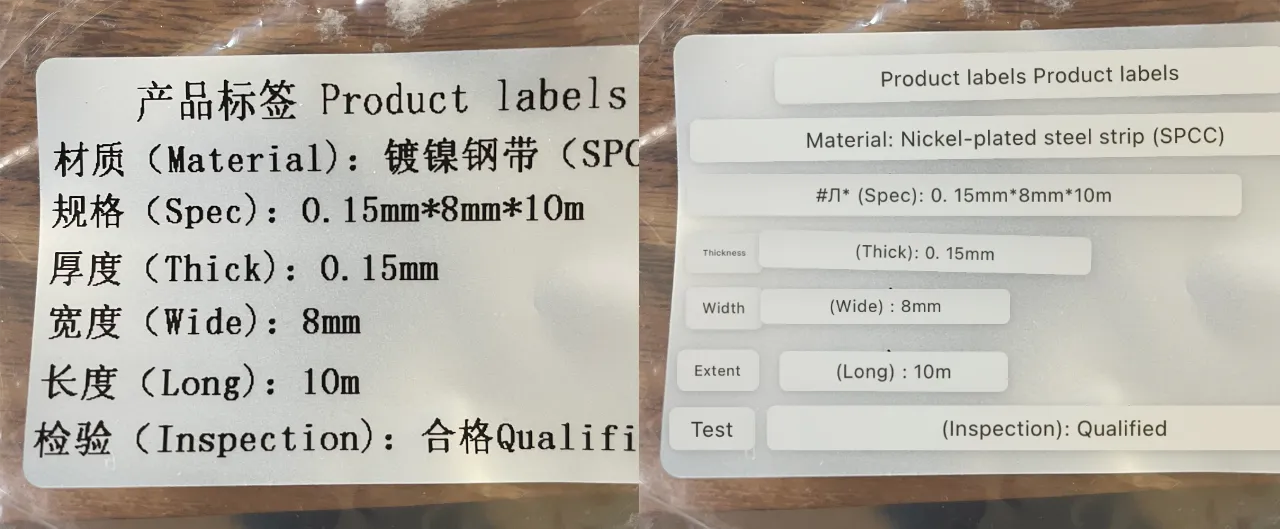
My error? What I thought was pure nickel, was actually steel with a very thin nickel coating.
But, after a bit more careful shopping I did end up with something that looked quite nice.
In the shallow dish the color looks slightly washed out, but if you look at it side on it’s actually quite nice color.
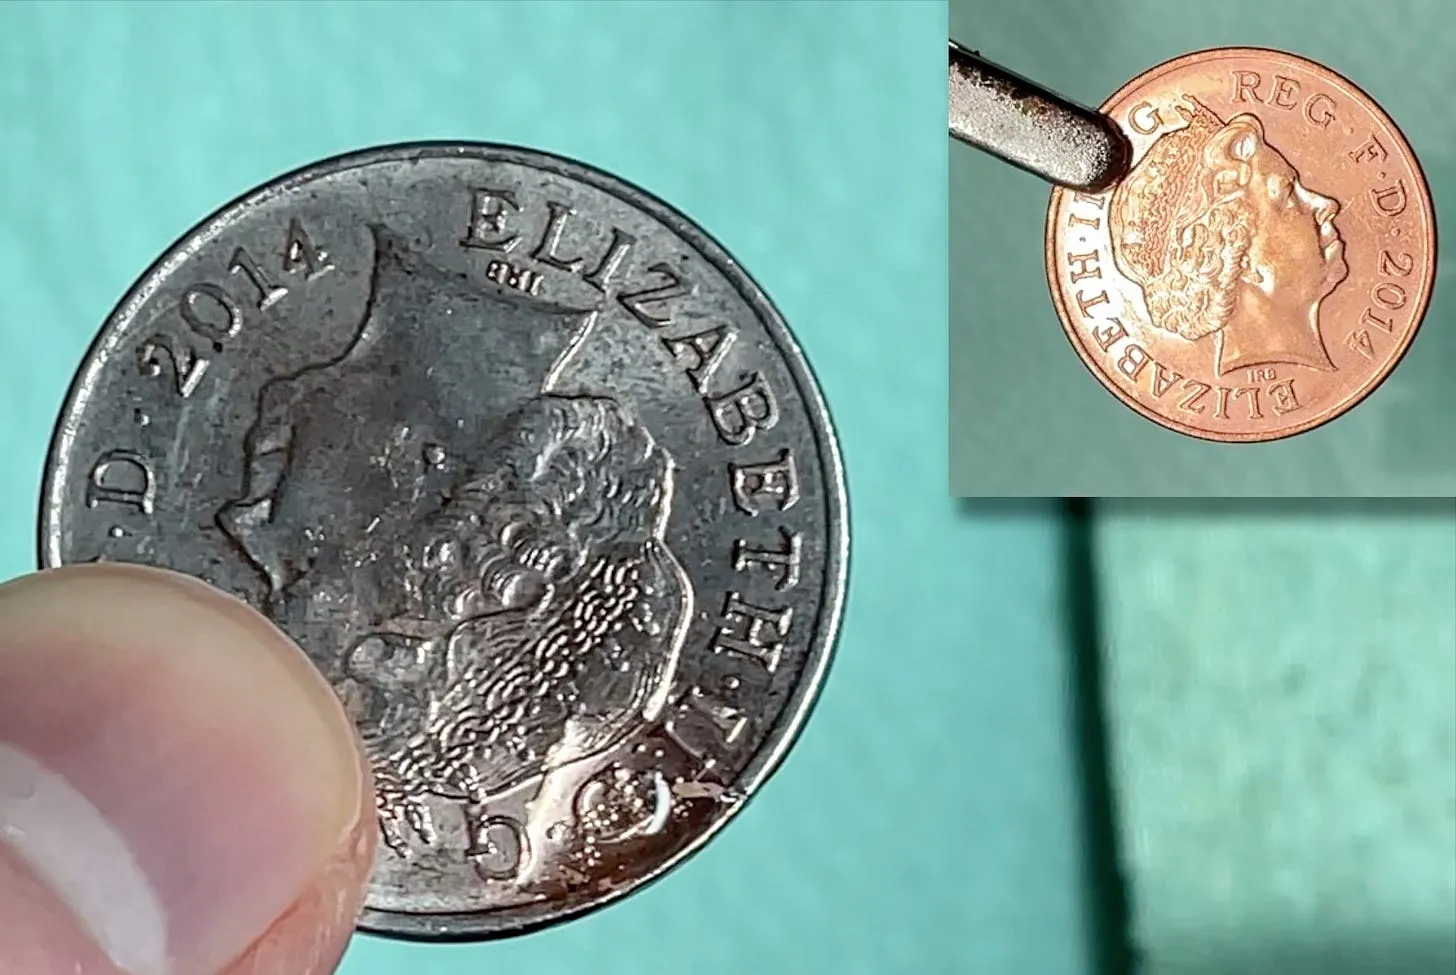
A quick test with a coin produced some pretty promising results.
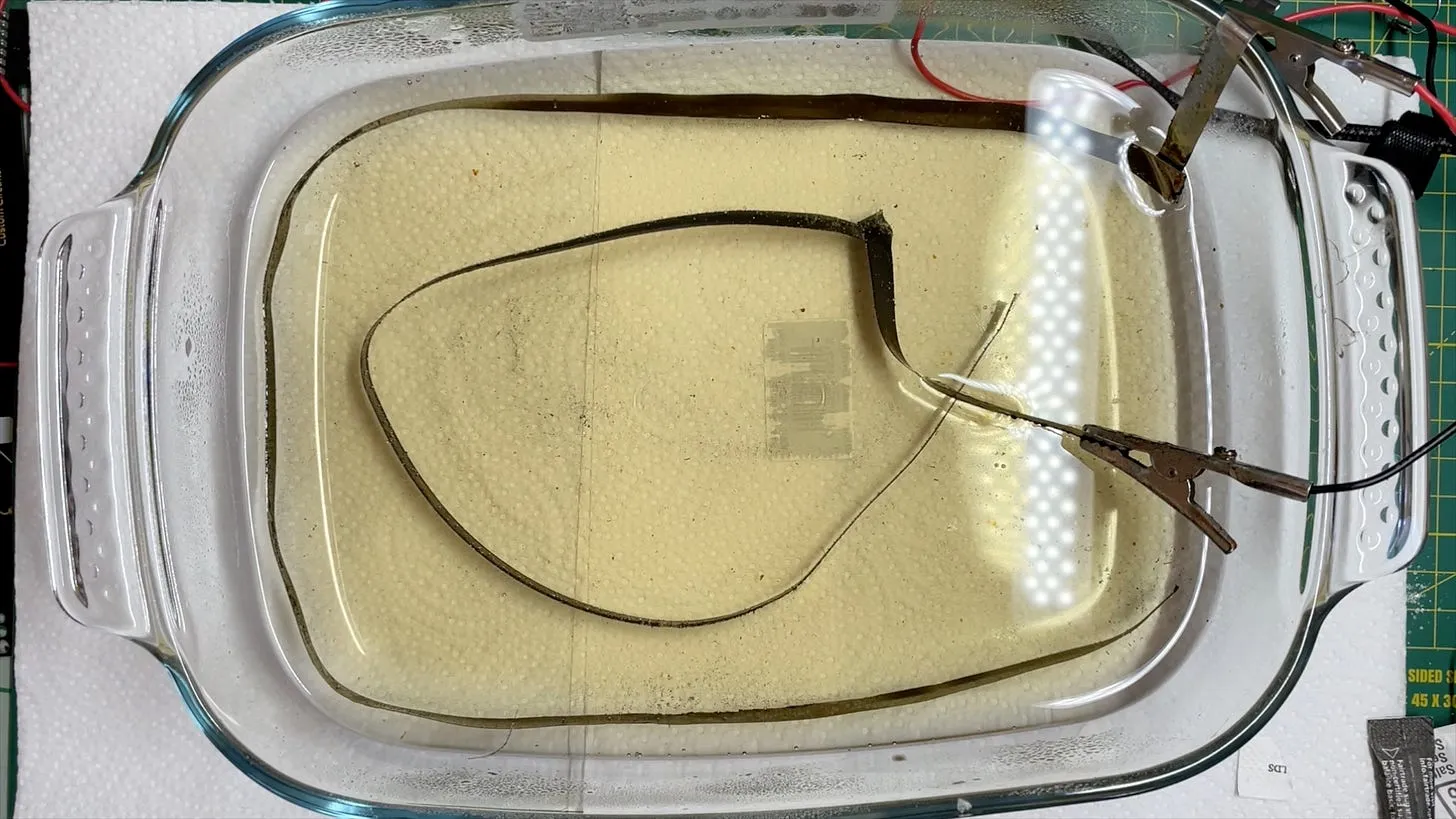
And after a bit of work to jumper over the resistors on the PCB I set to work trying to electroplate the copper.
The results were not ideal…

There were a number of issues:
- Despite my testing, some of my jumpers weren’t soldered correctly.
- Using a very shallow dish meant that the plating solution didn’t reach all the areas with equal concentration.
- I also got a bit impatient and used too much voltage - which causes a lot of hydrogen bubbles.
- Some of the copper was not very clean and was badly oxidised leading to poor coating.
- I tried to clean the copper by doing some reverse electroplating - this contaminated my liquid with copper, lead and various other metals.
Fortunately, this wasn’t the end of the world - I’d already recreated the PCBs and ordered some nice versions from PCBWay.
This PCB is a drop in replacement for the existing one, but it still suffers from the same problem of the contacts scraping on the surface. I do have several spares now as I ordered 5 of them. But I thought it would be interesting to try coasting these PCBs.
This worked considerably better - I used a much lower voltage. I think my liquid is contaminated, but I did get quite a good coating.
Did it actually make the PCBs tougher? I think it might have done - I did a very unscientific test and tried to scratch the surface and I think the nickel coated version was harder to scratch.
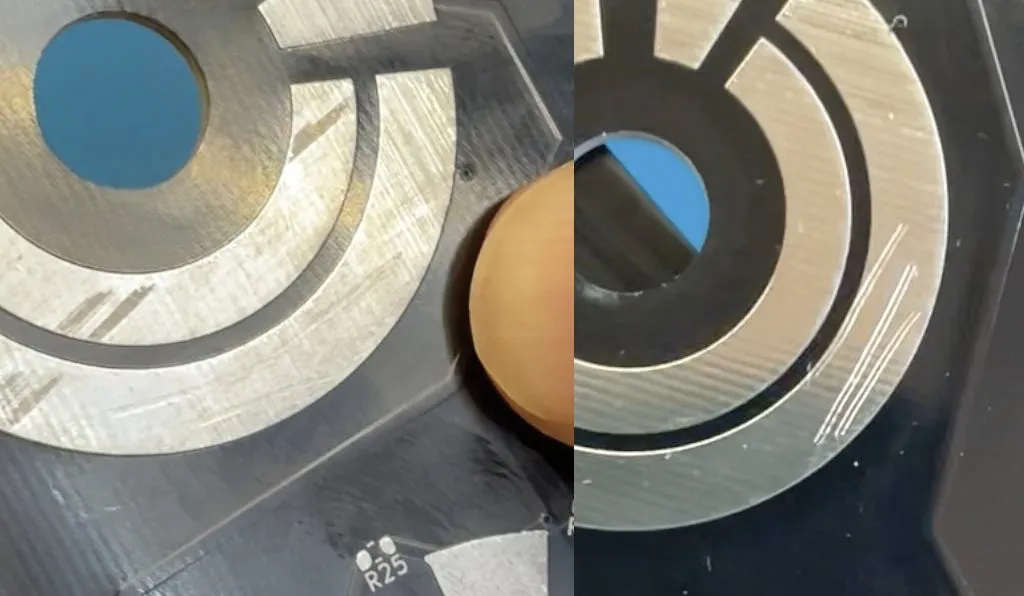
It felt harder to scratch the coated version and it certainly looks like the uncoated version has deeper scratches.
More experiments are required - it’s certainly interesting.
The bits and bobs:
- You can buy some nickel electrodes here (affiliate link): https://amzn.to/49A8Go3
- Suitable vinegar (5%): https://amzn.to/3uBqT5E
- The resistor box is this one: https://s.click.aliexpress.com/e/_DkKRt8V
- And the power supply (shop around for a cheap price!): https://s.click.aliexpress.com/e/_Dd3YFVB